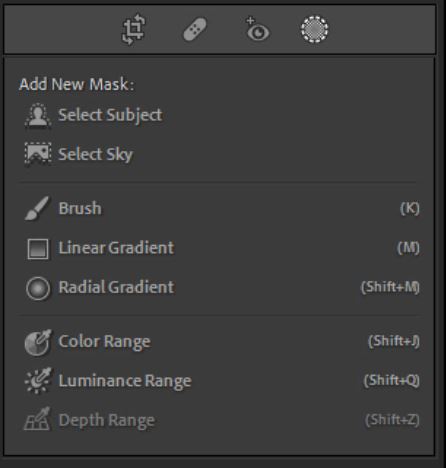
A few months ago Adobe made a huge Lightroom Classic update. It was the biggest update in years, and the new AI-assisted masking tools they added in the Develop panel are wonderful. The Develop panel interface does look a little different now, because the local adjustment tools Adjustment Brush, Radial Filter and Gradient Filter (now renamed Brush, Radial Gradient and Linear Gradient, respectively) are now located within the new Mask Panel. Within this Mask Panel there are also new selection tools, including Select Subject and Select Sky, plus some other great masking tools that will give you incredible control over your local adjustments.

Lightroom has had masking features like the adjustment brush, radial filter and graduated filter for a long time, and while you could get great results, it could sometimes be time-consuming to carefully create and refine your masks, especially around difficult areas like trees or when you're trying to select people. So you will especially love the Select Subject and Select Sky, which use AI to automatically make a smart selection. Then there are other tools like Invert Mask, Intersect Mask, Add/Subtract, plus Luminosity Range and Color Range to help you narrow down your selection further.
In this Lightroom Masking video tutorial, I'll walk you through the new Select Subject Mask, Select Sky Mask, Color Range and Luminance Masks. Plus learn how to use the new Invert Mask and Intersect Mask options. Let's get started.


