If you applied a bunch of adjustments to a photo and decide you don’t like how it looks or changed or mind, or maybe you applied a preset and it looks hideous, you have several easy ways to undo it in Lightroom. Unlike Photoshop, which makes pixel changes to your images, all of Lightroom’s edits are actually instructions to the database. In Photoshop, once you have closed the program, the history is gone from the buffer. But in Lightroom this history of all your steps is always available to you, days, months and even years later. So let’s look at different ways you can undo what you did.
Ctrl/Cmd Z
The first way is if you only need to undo the last step or two is to simply hit Ctrl/Cmd Z to undo.
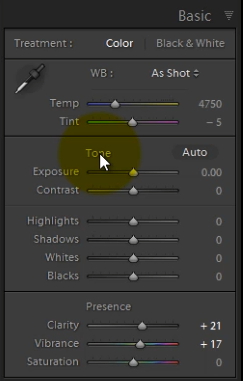
 If you want to reset all the sliders in a panel, or a panel section, either doubleclick on the slider name or on the heading. So if I want to reset exposure to 0 I can just doubleclick on Exposure. If I want to reset all the Tone sliders I can doubleclick on Tone.
History Panel
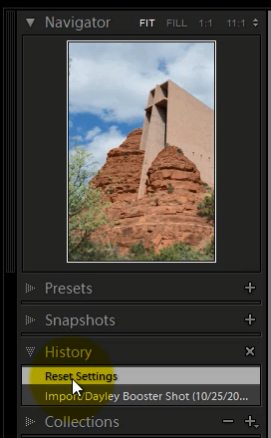
But maybe you want to go way back, 10 or 20 steps. You can use your History Panel. It keeps track of every change you make in the develop module. It’s sequential so it lists edits in the order they were applied, with the latest on top. You can go back a few steps or all the way back to Import.
If you want to see how your photo looked before you made an adjustment, you can hover over a previous change and check out the navigator in the upper left of your screen. If you decide you like that better, just click on the state and the edits made after that point will be undone. If you change your mind, the last updates will still be there. BUT, if you make more edits, then they will disappear.
Reset
 If you want to go back to zero and start over, you can click in the history panel on Import and the image will go back to how it was when it was imported. But what if you applied an develop preset when you imported your photo? Then your image goes back to that state. You can see the sliders are not zeroed out, they are just back to where they were when the import preset was applied. So if you really want to go back to the way it was right out of the camera, click the Reset button on the lower right. This zeroes out all the sliders. Another advantage of using Reset vs the History Panel to go back to the beginning is if you change your mind, since Reset becomes part of the History, you can undo it.
Snapshots
One other thing that is helpful is if you want to make a record of how your image looked at a certain point so you can go back to it later, you can make a Snapshot. Just above the history panel is the Snapshots panel. To create a snapshot click the + sign and name your snapshot. Lightroom with take a virtual snapshot and you can continue to make edits. If you want to compare your latest edits with the snapshot, open up your Snapshots panel and click on the snapshot you want to look at.
Finally, if you want to create a different version of your image, say a black and white version but still keep your original edited version, y ou can create a Virtual Copy. A virtual copy is not a physical, pixel-based copy, rather it is a different editing “recipe” or set of instructions to the catalog. Right click on the image and click on Create Virtual Copy and now you can make new edits and still have your original version.
